
1. In vCIOToolbox, get your unique URL for MCP connection. Navigate to Name > MCP Configuration.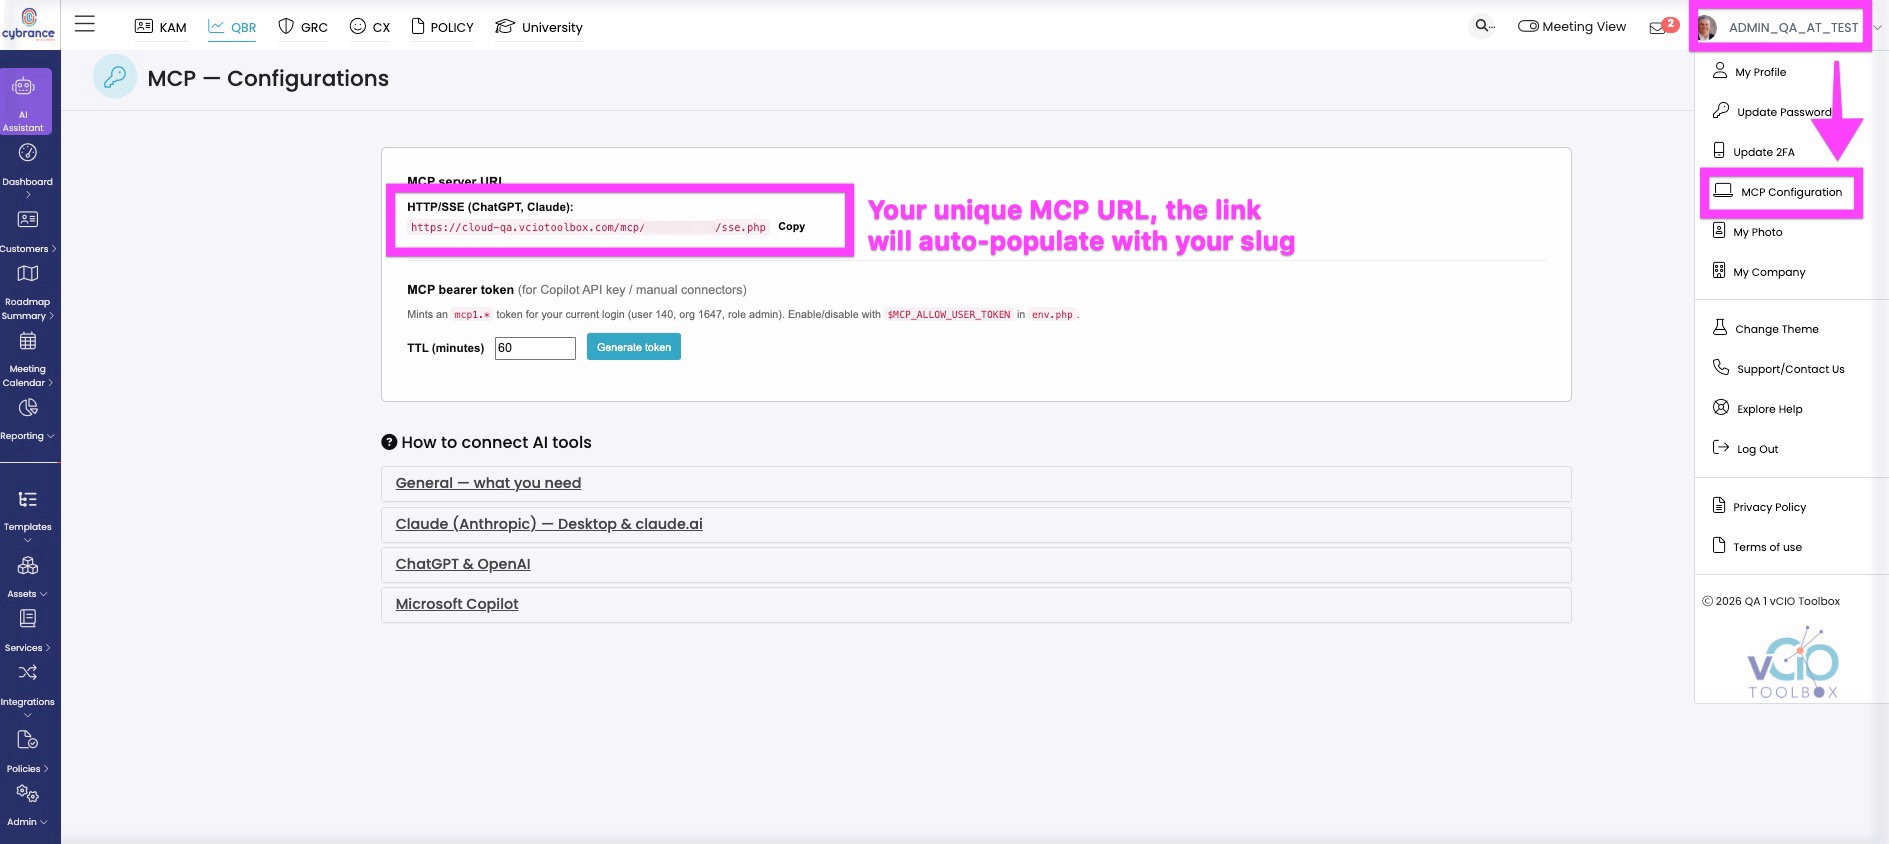
2. Log in to Microsoft 365 and navigate to https://copilotstudio.microsoft.com/ and sign in with your credentials.
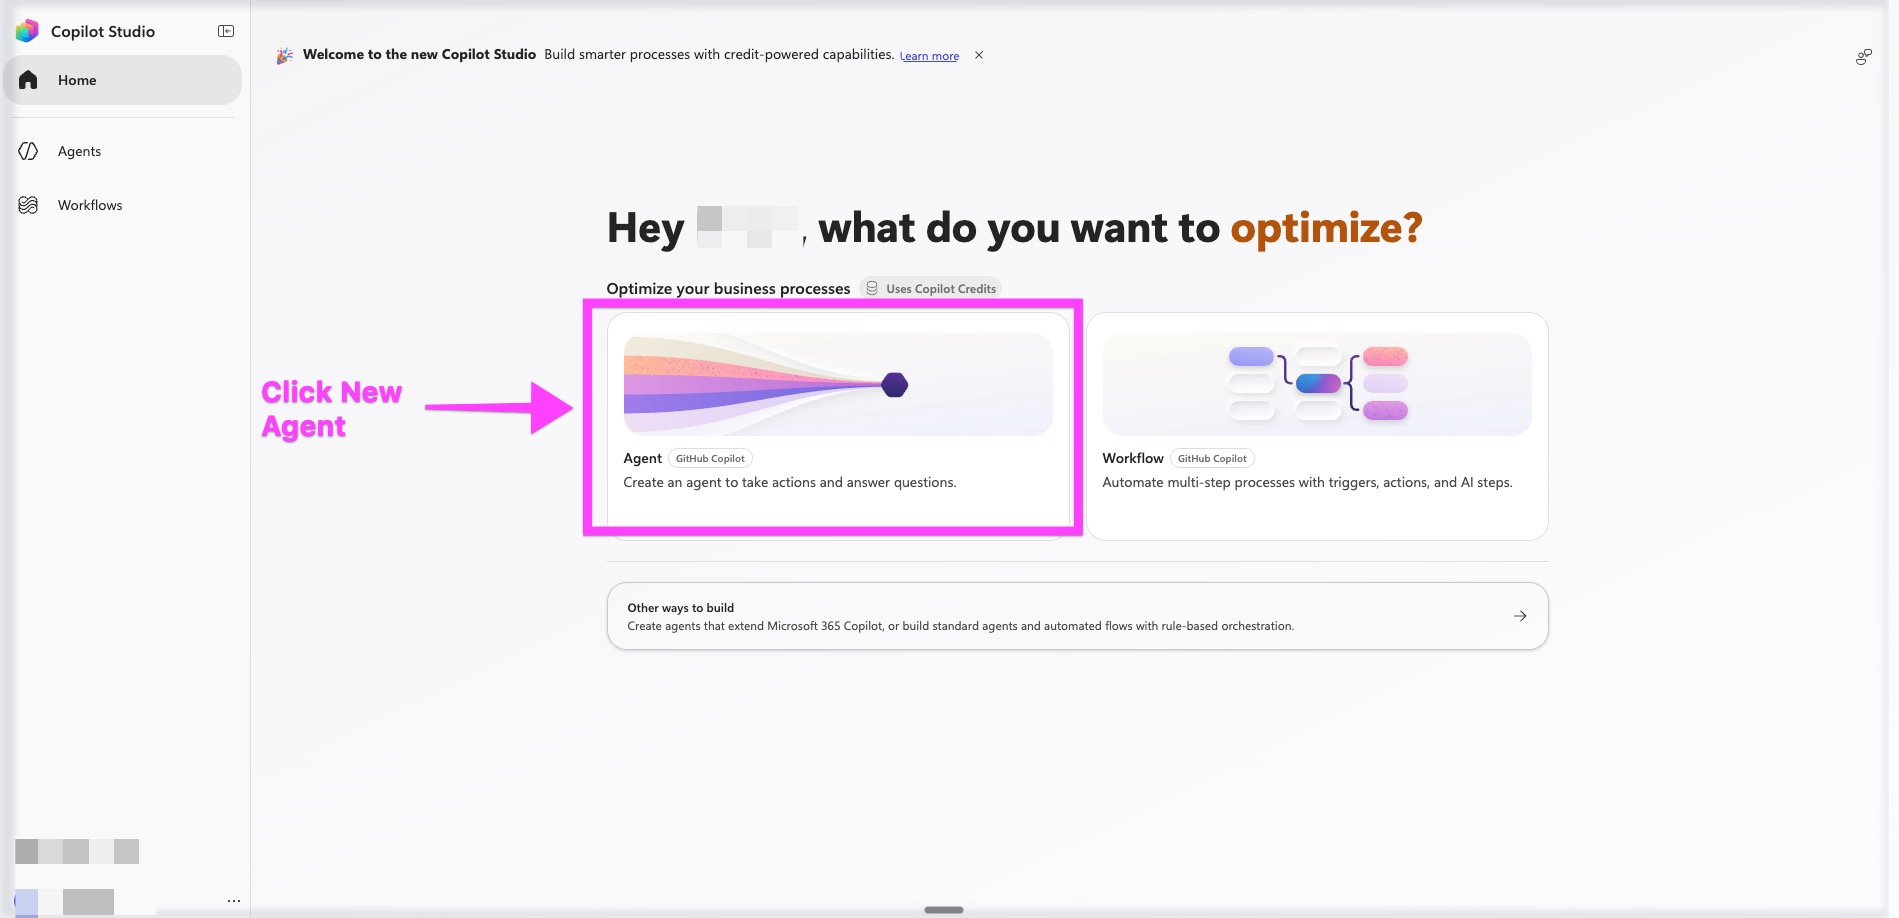
3. Click on Create an Agent.
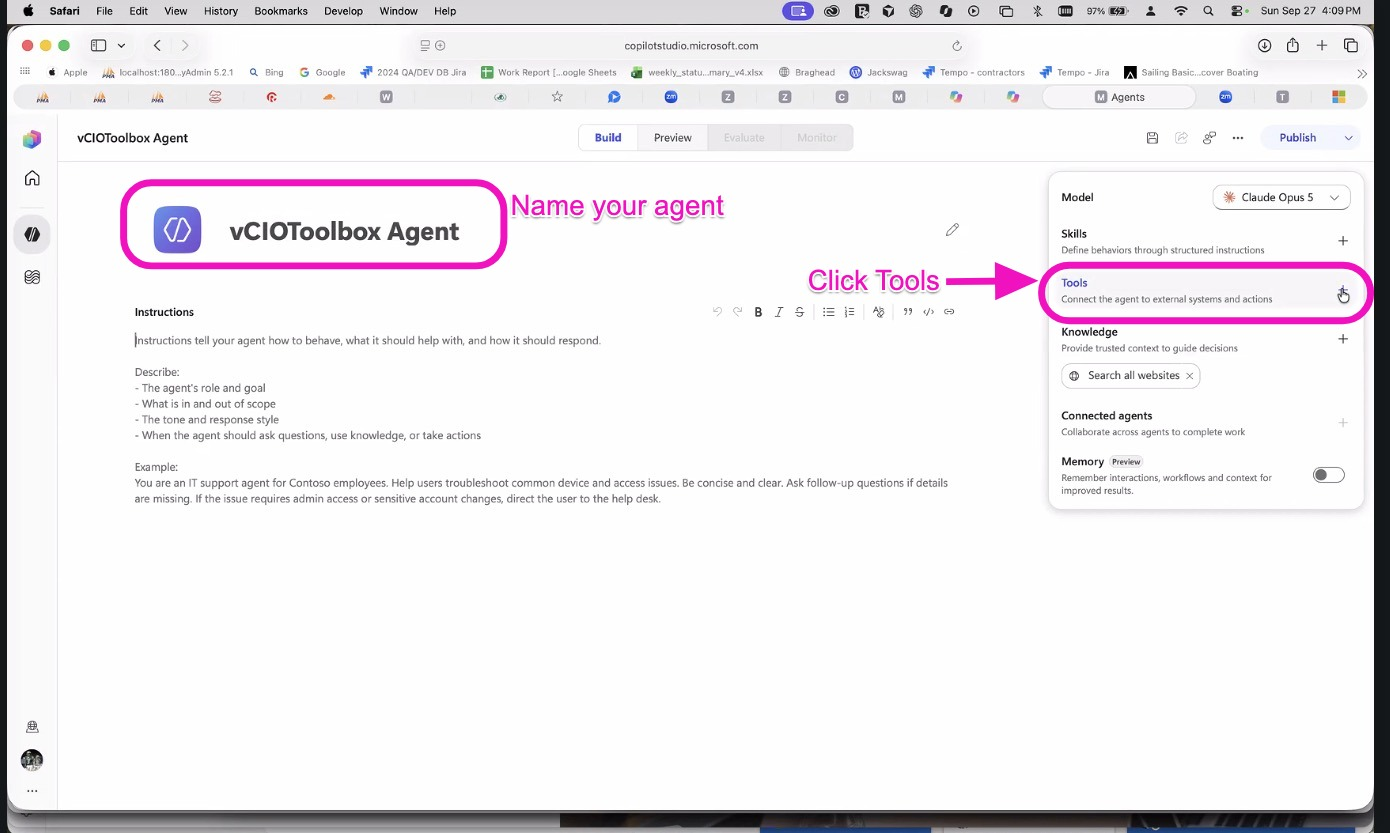
4. Name your agent and click Tools.
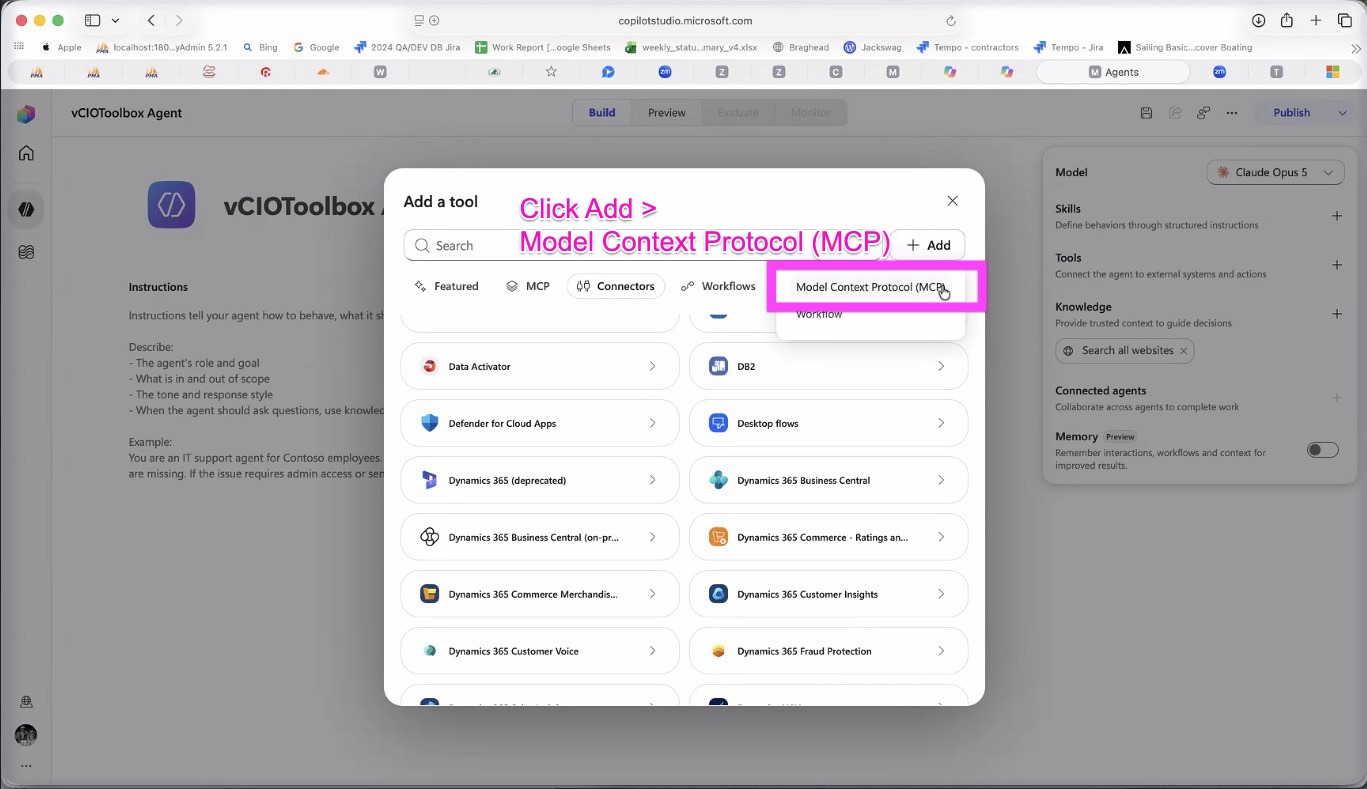
5. In the prompt window, click Add and choose Model Context Protocol (MCP).
6. Add your Server Name, Description, and Server URL (found inside vCIOToolbox). Authentication is OAuth 2.0; set your configuration type to Dynamic (with Discovery).
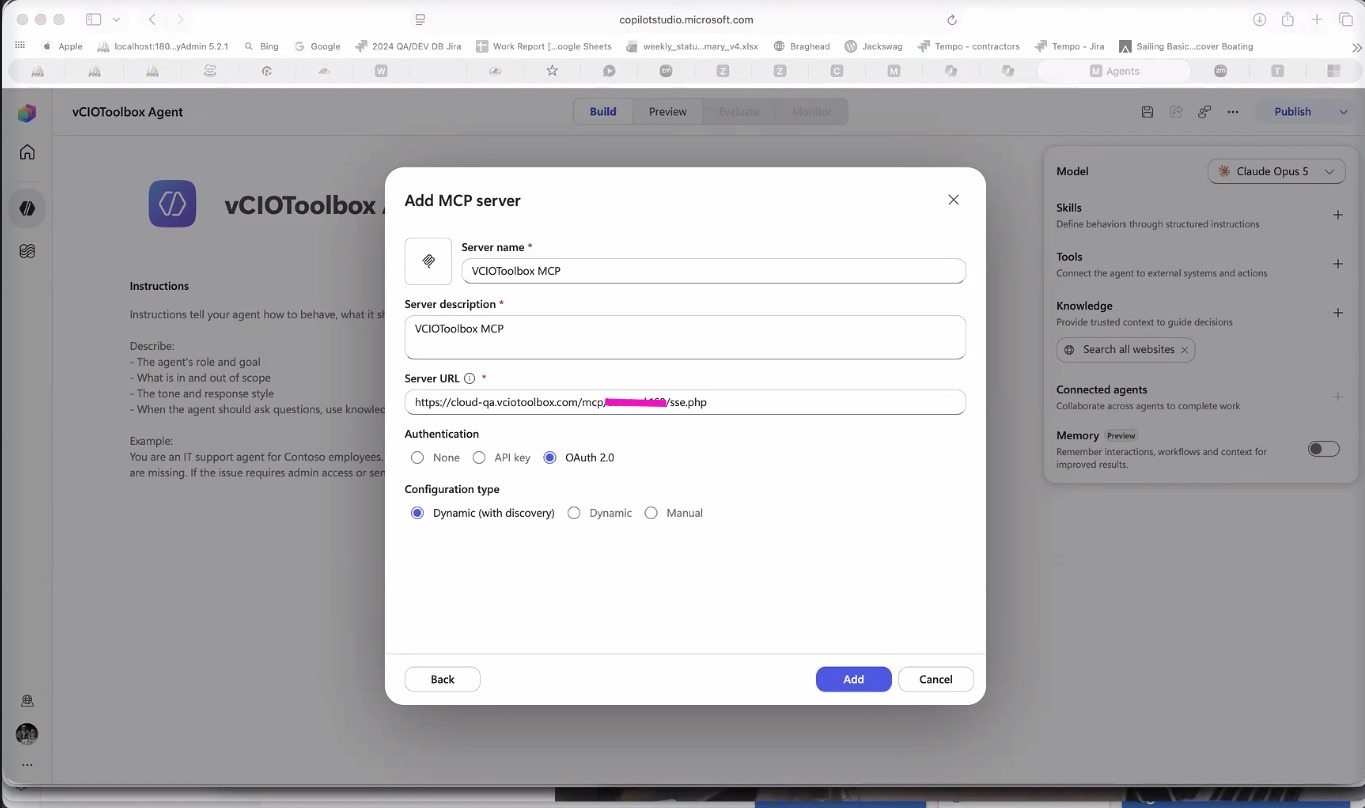
7. From Connection, click Create Connection
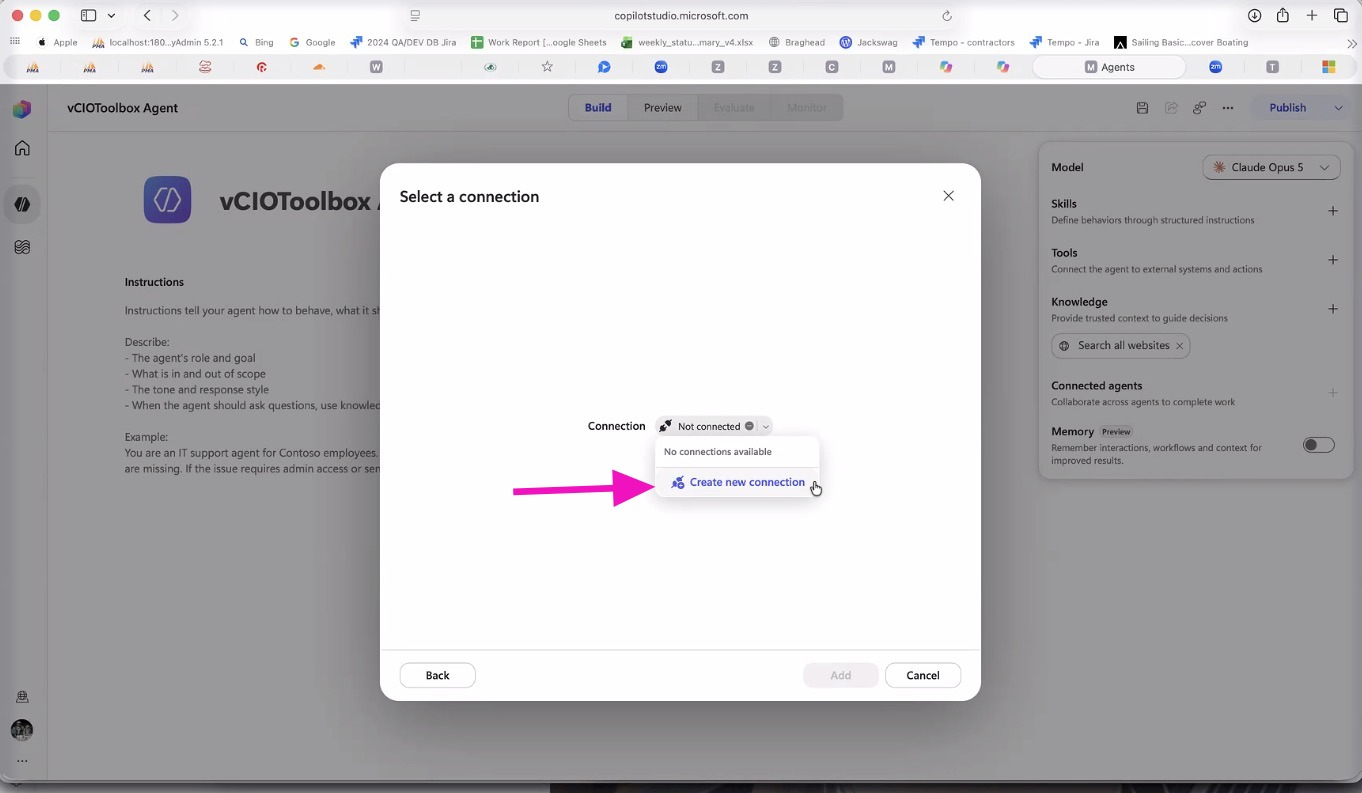
8. Click Create at the next prompt
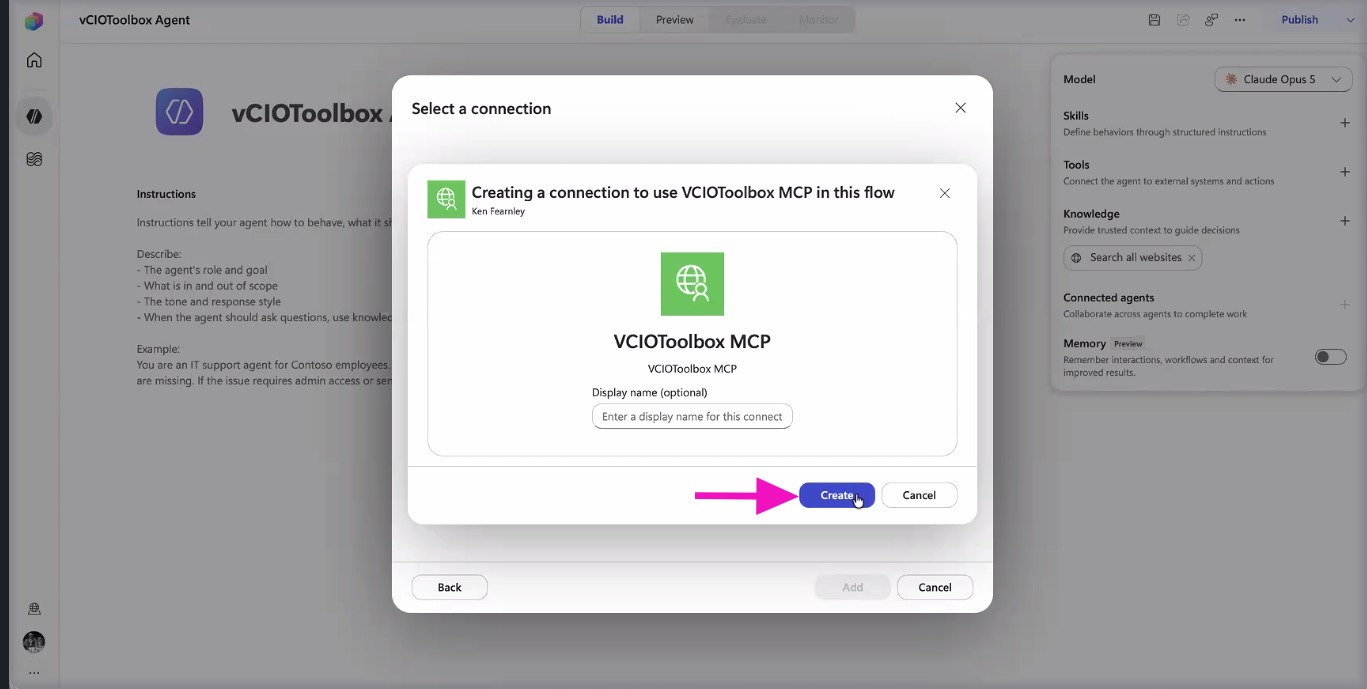
9. Authenticate using your credentials in vCIOToolbox
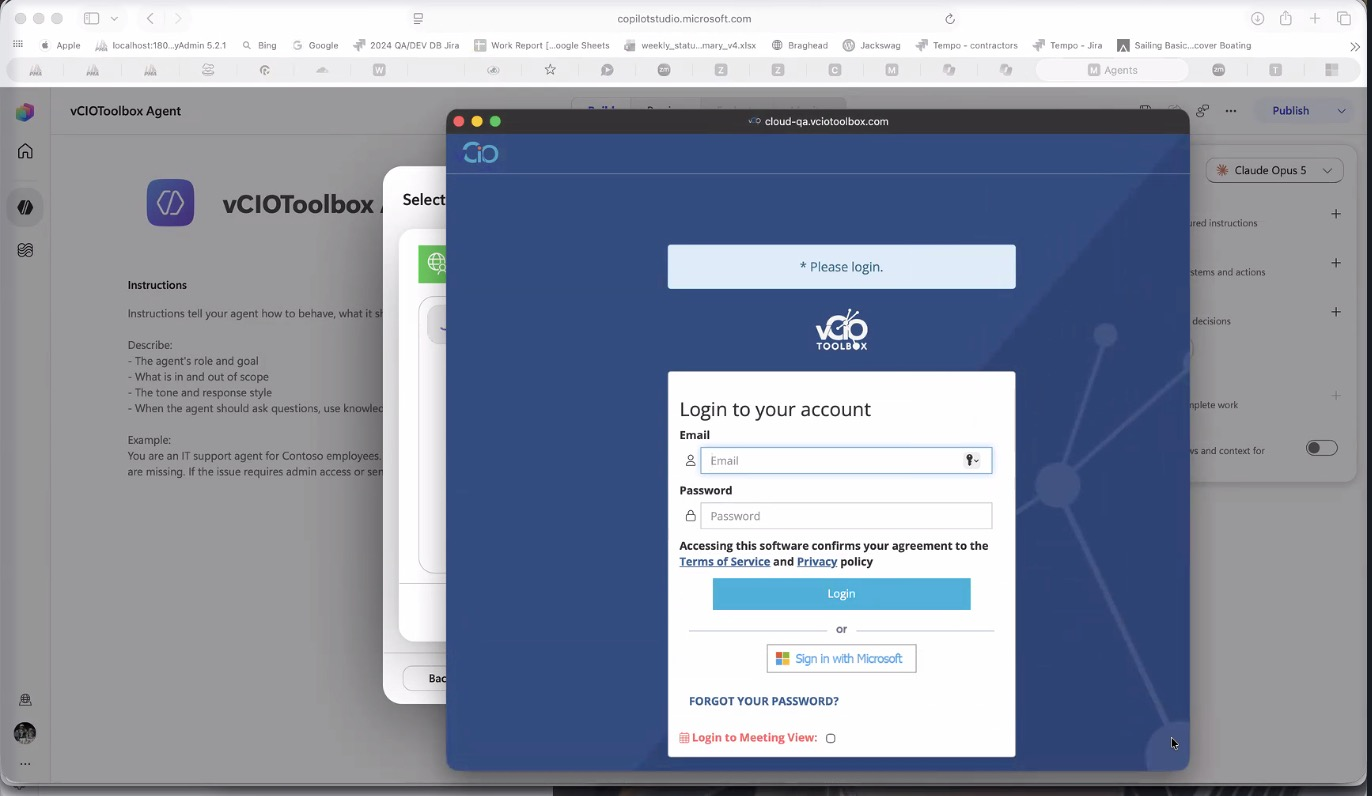
10. Authorize the Credential Manager to consent to the app.
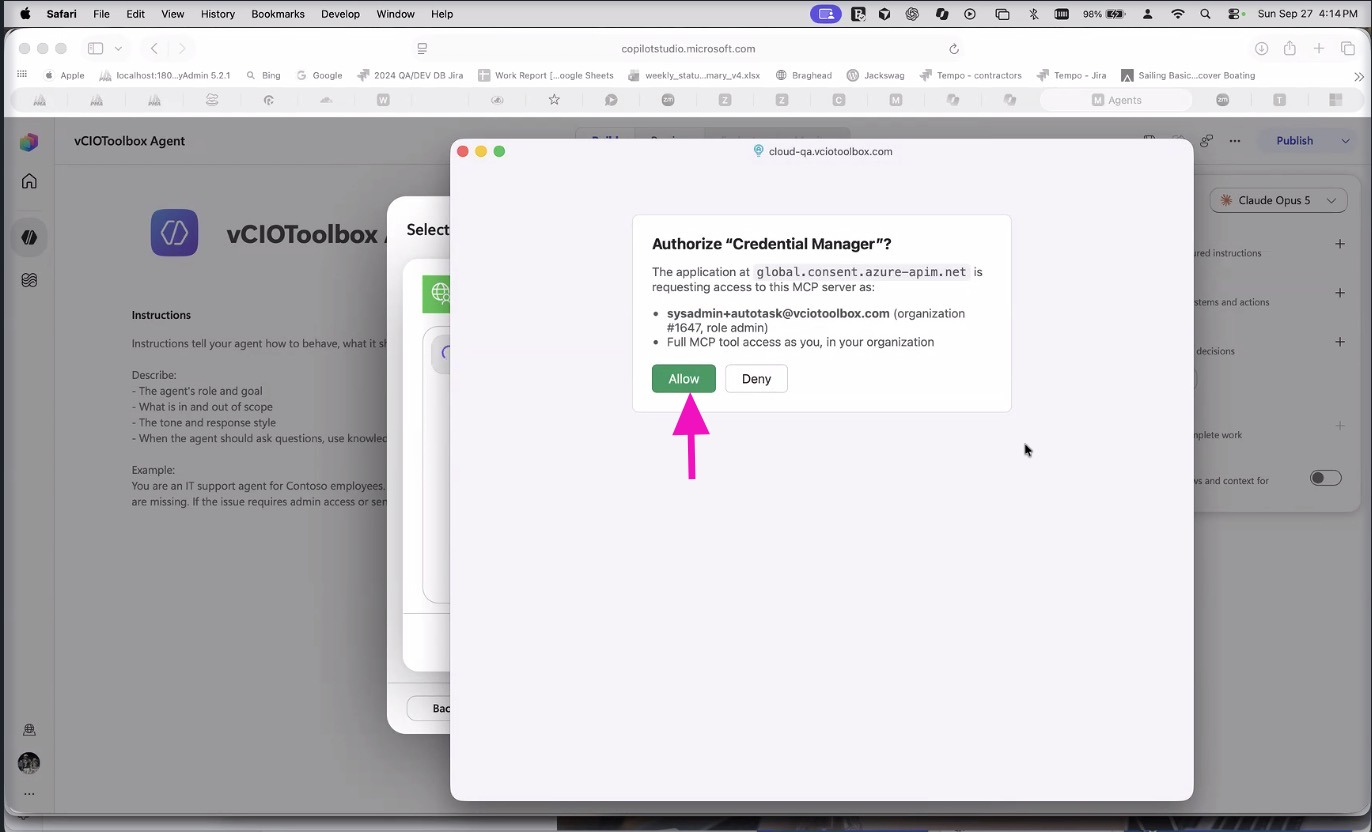
11. You will see confirmation that the connection is live.
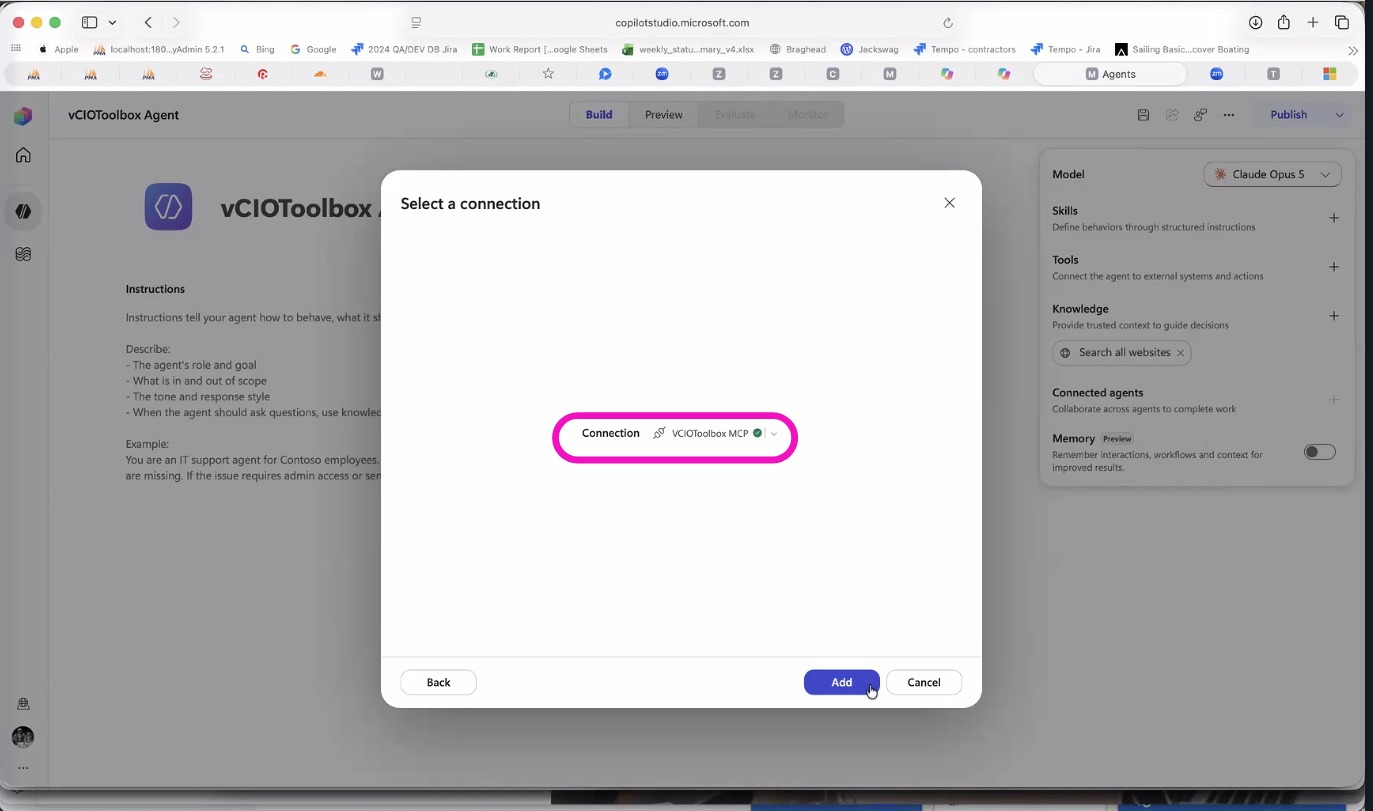
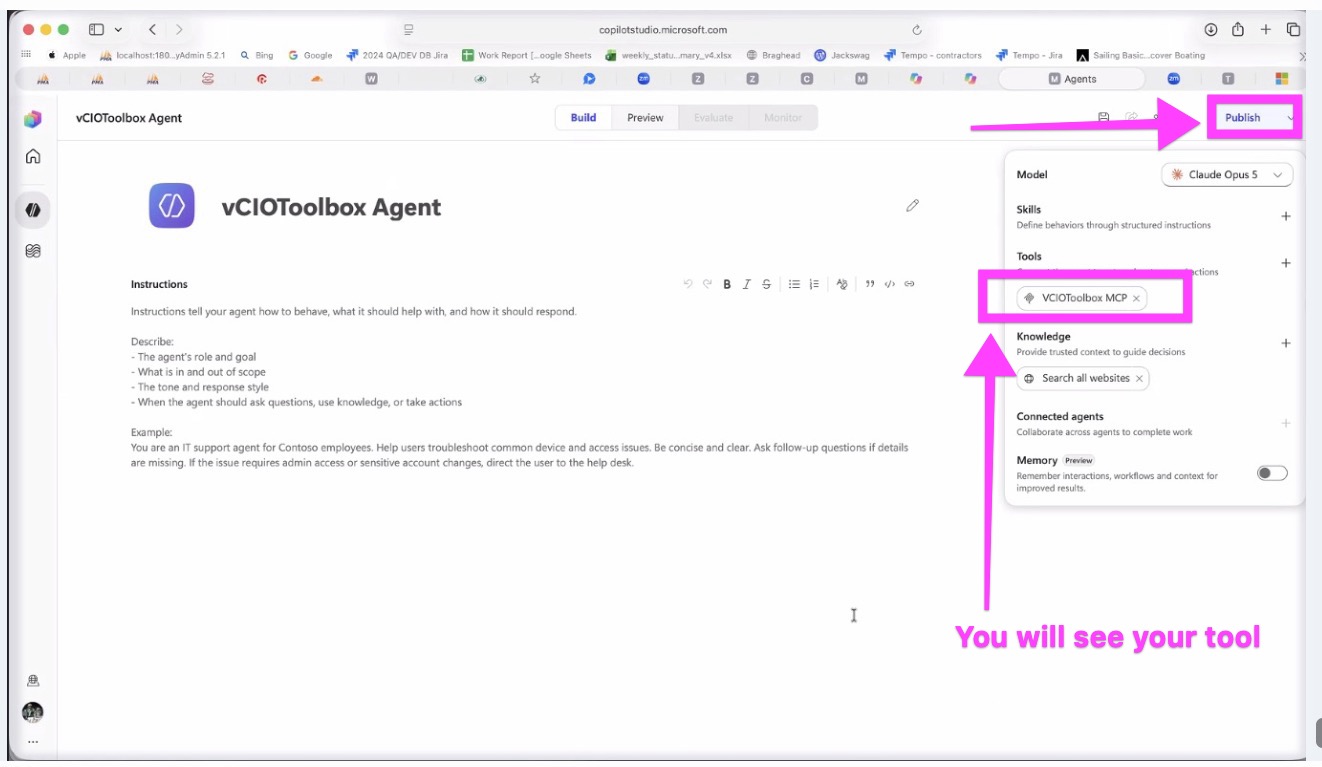
12. Navigate back to Copilot Studio and verify that you see your MCP server under Tools, then click Publish.
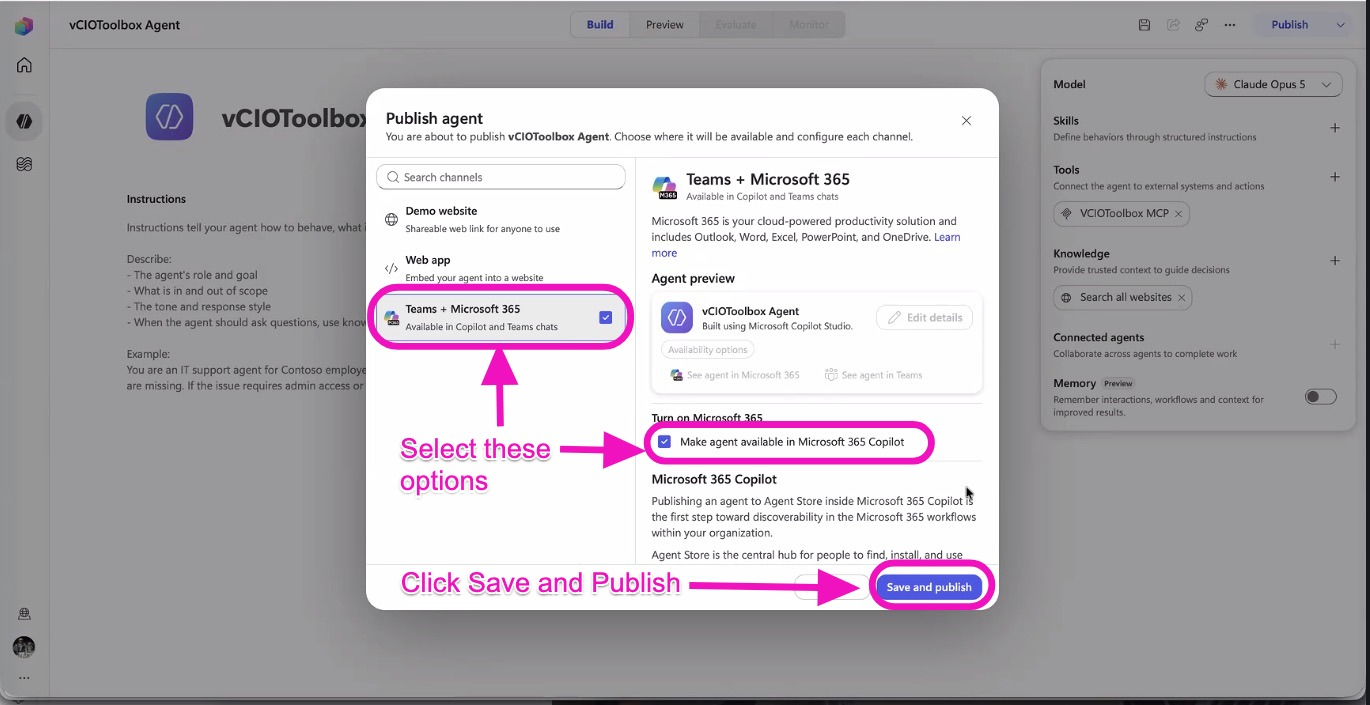
13. Select from the prompt Teams + Microsoft 365 and Make agent available in Microsoft 365 Copilot. Click Save and Publish.
14. You will see the agent listed under your Agents list in Copilot Studio.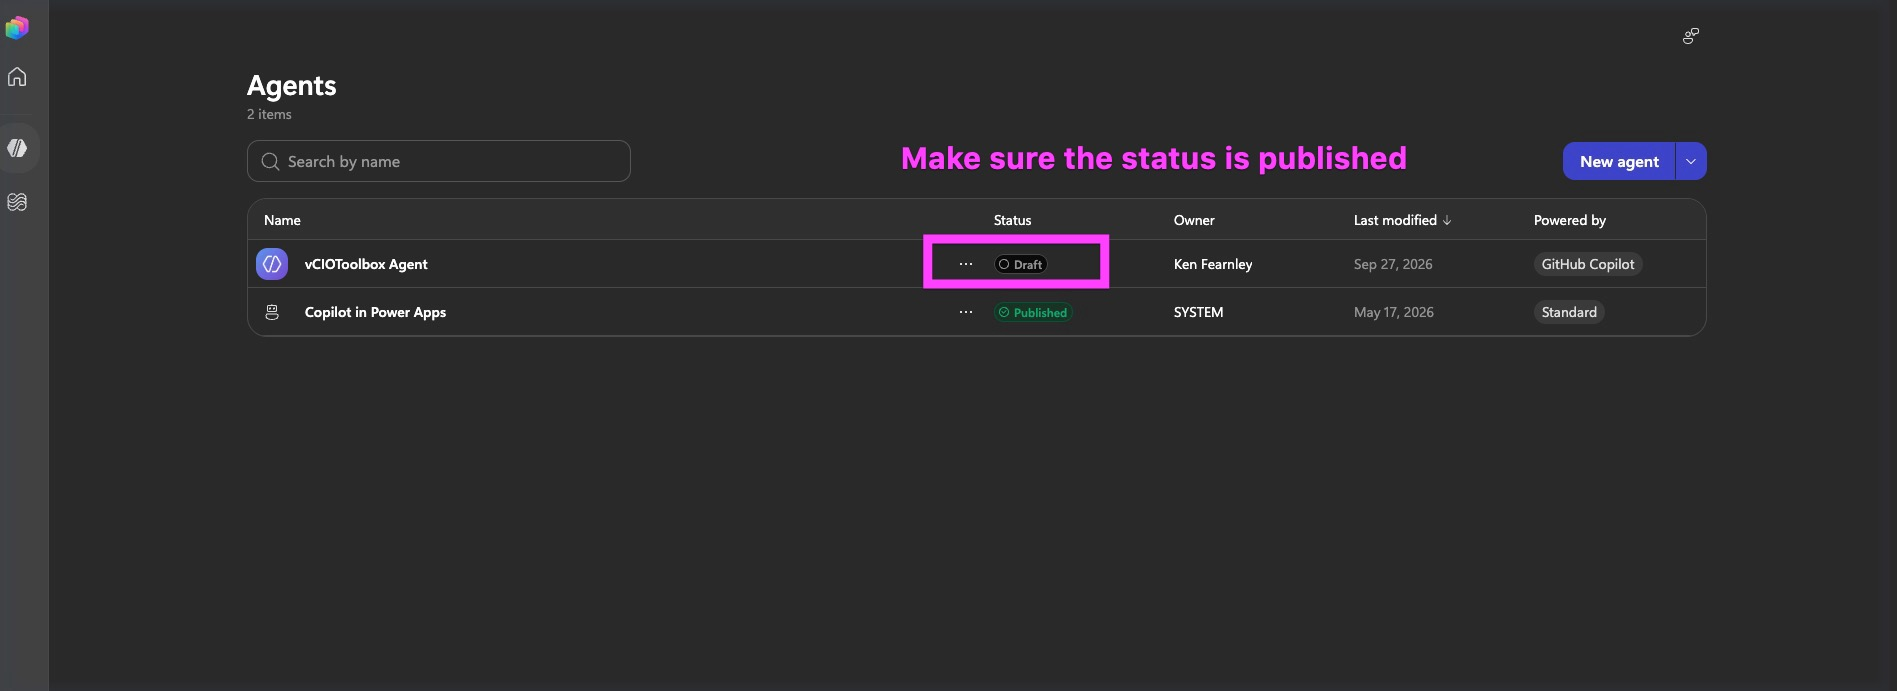
15. Share your agent and select your properties for sharing.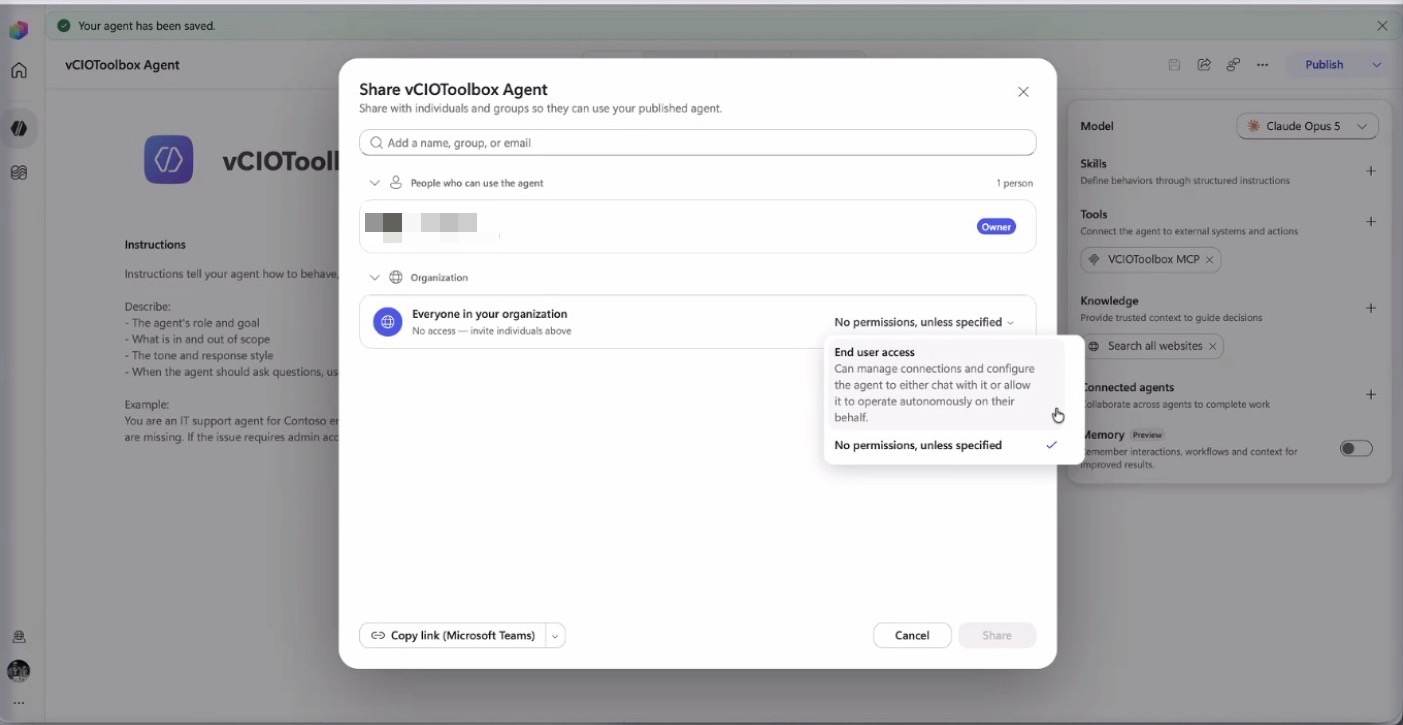
16. Share the link to connect via Copilot or via Teams with your users.
If you have any issues connecting, please submit a ticket to support@vciotoolbox.com or reach out to your partner development manager.